I love bread, not just eating it but most especially making it. I find bread making therapeutic. Yes, it takes a lot of time to make them especially the yeast bread, but it’s worth it. I have a peace of mind that I know what goes into my bread, and I can actually call it real bread, none of those enhancers and preservatives added. I do understand that not everyone have time and patience to make homemade bread. When you are busy, you got to do what you got to do. Do what suits best your schedule.
In my case, I am thankful that despite my super busy schedule I can still squeeze in time for activities like this, maybe not all the time but if I can make 2 bread a week, I am happy with that.
What Makes This Bread Unique
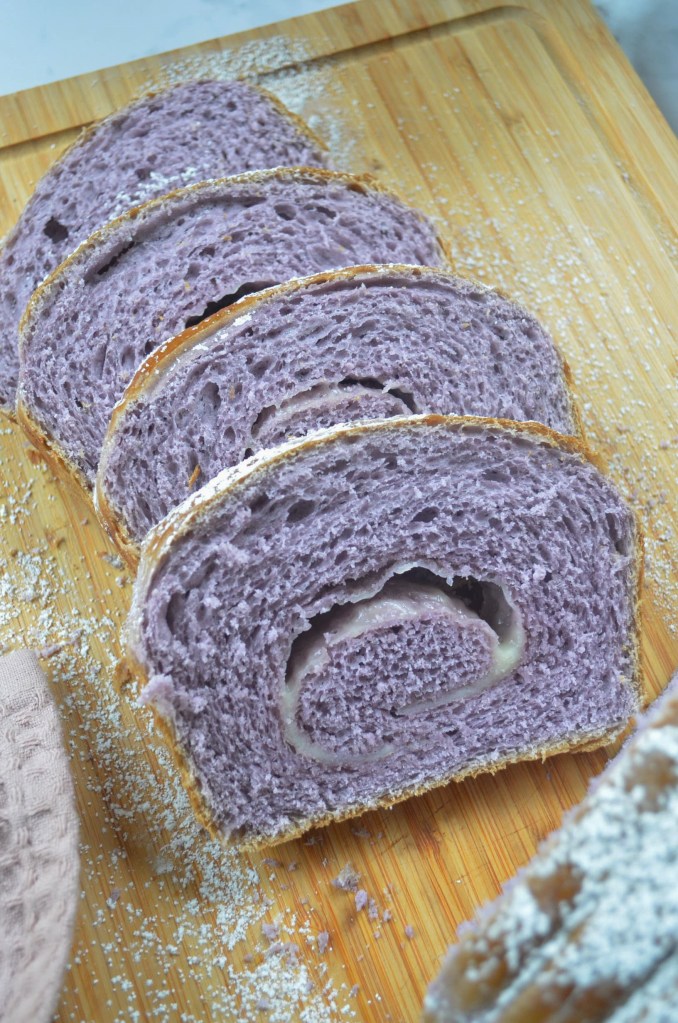
This bread is quite unusual, how often do you see and much more make a purple colored bread? I bet not quite often. In the Philippines, purple yam flavored deserts and bread is quite common. We use purple yam for various ways. We make it into jam , we use that jam for snacking, spreading on bread or as filling for bread. The natural purple color of the purple yam provides the attractive purple color even without adding any food color. I don’t like adding food color in my food so I stick with whatever natural color I can get from the purple yam.
For this bread, I mixed the grated steamed purple yam in the bread dough. The purple yam did not only add the nice purple color, it also made the bread soft. If you cannot grasp the idea is using purple yam, think about regular potato or sweet potato, that’s basically the same idea. The extra starch in the purple yam or potato and the moisture provides the bread a softer texture, and vibrant purple color that will never fail to capture attention.

Condensed Milk for a Touch of Sweetness
Most of the times, I used granulated sugar to sweeten my bread. For this once however, I used a mix of condensed milk and granulated sugar. The condensed milk being a liquid sweetener adds moisture and a touch sweetness to the bread. Nothing too sweet, just enough with a slight salty taste from the grated cheese. I love a combonation of sweet and salty in food.
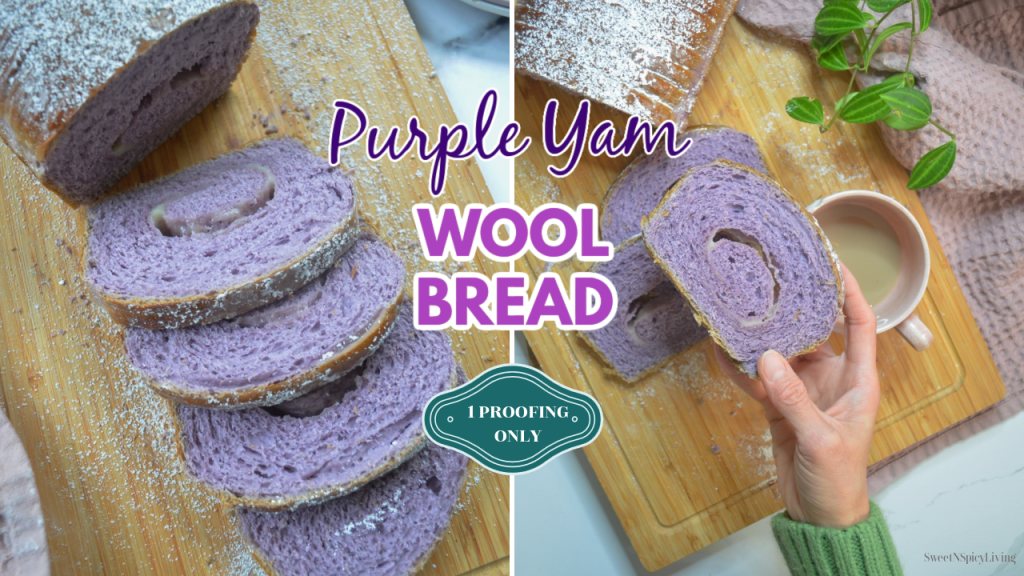
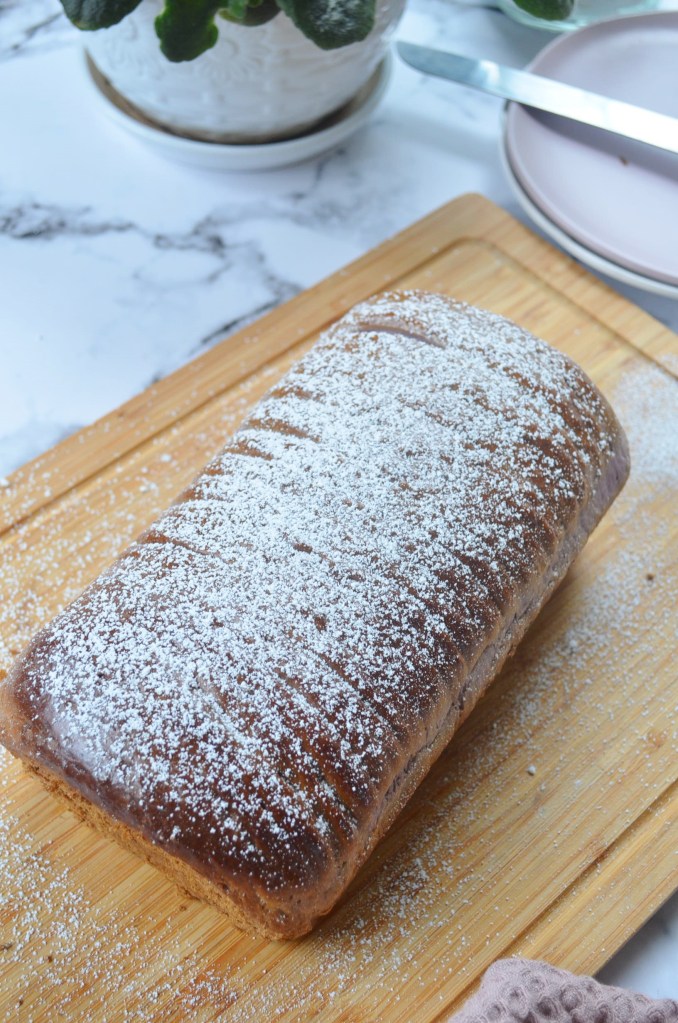
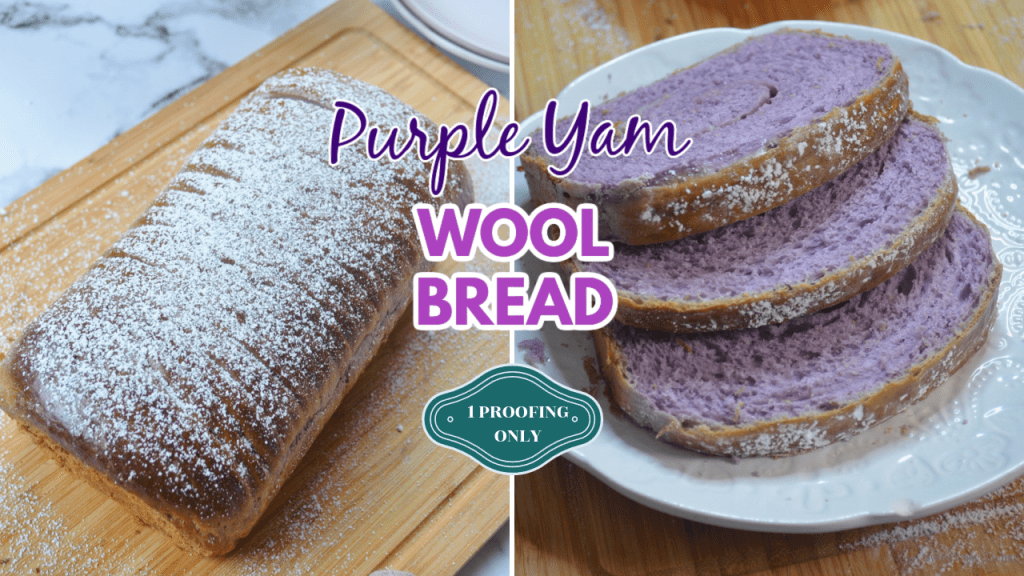
A Wool Bread
I’ve always been fascinated with Wool Bread, they look stunning and beautiful. Most of the wool bread I saw online uses a tube pan. This makes the design of the bread stands out as you can see the lines on the top of the bread, like a wool fabric. Although I have a tube pan, I thought I would try something different. I decided to use loaf pan instead. The bread came out beautiful, showing lines on top, but not as much when you use a tube pan. I guess that is because when you use a tube pan, the dough will be stretch to follow the curve and this exposing more of the lines. Nonetheless, I think loaf pan works too if you don’t have a tube pan.
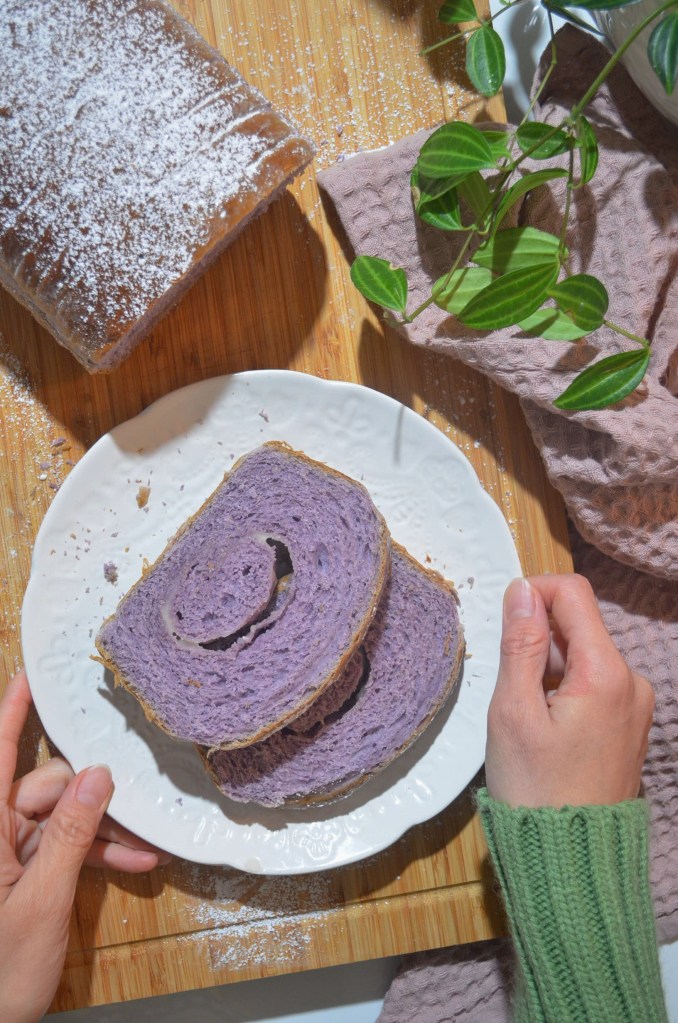
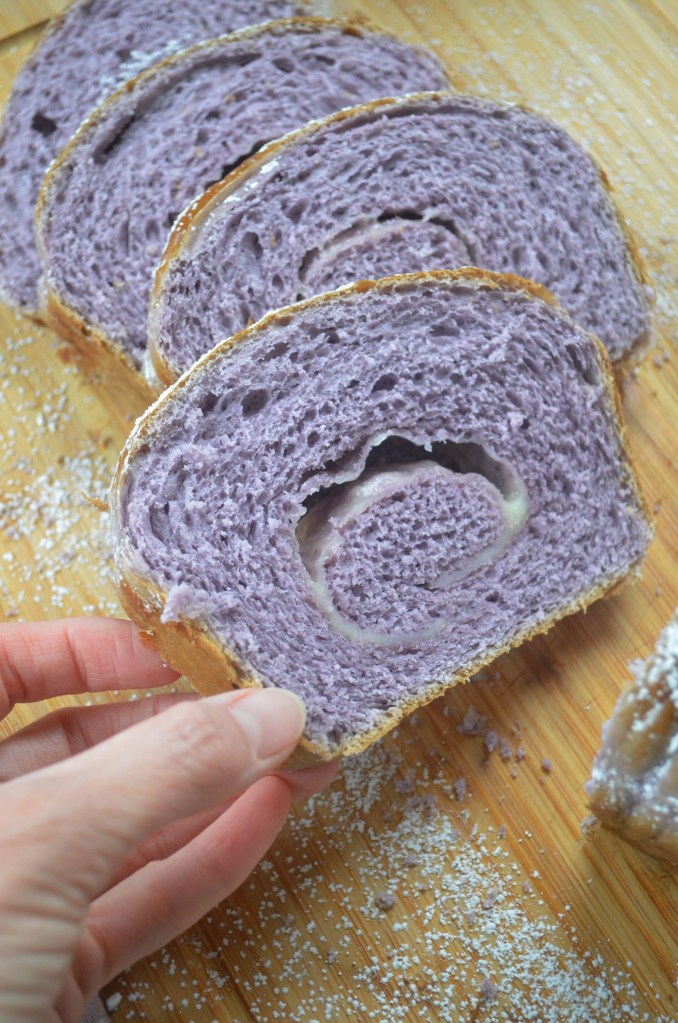
A Cheese Filling to a Touch of Savory
The bread was filled with grated cheddar cheese for a savory touch to the breda. The cheese melted nicely, adds a touch of savory taste and nicke look to the swirl bread.
Purple Yam Jam, Anothet Option for a Filling
Onother great option to use for filling is a purple yam jam. Not that common for most household but you can buy it in grocery and they come in bottle. You can also make it from scrath, I have a separate video for that.

Active Yeast vs. Instant Yeast
Because yeast plays a very important role is making this soft and fluffy bread, let’s take few minutes to understand it. What it is, what are the common types of yeast, the difference among the yeast, and what role the yeast do in bread. I normally encounter 2 types of yeast in most recipes, and in the grocery so I decided to focus on this two types of yeast, although there is a 3rd type “Fresh Yeast” but I never used it.
Types of Yeast
- Active Dry Yeast – This and the Instant Yeast are what I used in most of my bread. In terms of appearance and texture, this kind of yeast are coarser and have bigger granules. It requires to be dissolved in warm water with sugar to activate it. It normally takes 5-10 minutes to do this, and you will now that it’s been “awaken” when bubbles starts to form in the surface of the water, and you would be able to smell it too. This last longer in terms of shelf life and should be kept in a cool dry place. I kept mine in the refrigerator.
- Fast Acting or Instant Yeast – In terms of appearance, this kind of yeast have a finer granules as compared to active dry yeast. This does not require to be dissolved in warm water and sugar. This can be mixed directly with the dry ingredients such as flour, just make sure to keep it away from salt when you mix it as salt can kill the yeast when they touch directly with each other. I normally mix the flour, salt and leavener then I add the instant yeast last. This should also be kept in cool and dry place. You basically save 10 minutes of time when you use instant active yeast as you skip the activation process.

Interchanging Yeast
You can interchange active yeast and instant yeast in the recipe, I sometimes do this when I have the other and the recipe calls for the other. You just have to be mindful of the measurement. For dry active yeast you generally need to use half the quantity of fresh yeast stated in the recipe and for instant yeast you need to use 1/4 of the quantity of fresh yeast. The fresh yeast has higher measurement, followed by active yeast, then instant yeast. Let’s say the recipe calls for 30g (1 ounce) of fresh yeast, you can substitute it with 15g (.5 ounce) active dry yeast, or 7g(.25 ounce) instant yeast. Just don’t forget the when you substitute instant yeast with dry active yeast, you have to dissolve it first in warm water to activated it. Do not just mix it along with other dry ingredients unless specified in the recipe.
So, now that’s the basic of yeast. Let’s have a look at some very important tips that we should bear in mind in making yeast bread.
Tips for a Successful Soft Homemade Bread
- Liquid Temperature – Yeast grows in temperature between 105 – 110F, so its important to have the water that you are using to “proof” it in this range. If you go lower or higher, the yeast might not proof properly. That means the bread will not rise as much, resulting to a flat and tough bread.
- Check Yeast Expiry a Date – you might be wondering how come the bread did not rise when you followed exactly the recipe. Well, first thing first, make sure the yeast is not yet expired. Expired yeast is the common reason for flat and dense bread. If your bread did not expand or rise during the rest period, it is most likely that the yeast is not fresh or the water temperature is too hot or cold.
- Amount of Yeast – Just because you want a tall bread doesn’t mean you have to put as much yeast in the mixture. Sometimes adding too much yeast can cause the bread to collapse during the rest period. Just imagine putting more air than what is needed in a balloon, the balloon will explode. The same case with bread.
- Right Type of Yeast – We’ve discussed the 3 types of yeast above. Make sure to use the right one for your recipe, and make necessary adjustments if you want to swap one from another.
- Rest Period – Yeast bread needs time to rise. There are bread that uses less yeast but requires more rest time, the likes of No Knead Bread or Artisan Bread which usually require 8- 16 hours rest period to get the volume and to develop the flavor. There are 1 hour bread like my Rosemary Dinner Rolls which used this same bread dough, and there is 1 proofing only bread like this one. The point is, give it time to rest, don’t touch it just leave it in a warm place. The first rest period (if doing double rest) will normally tell you if your dough is good or not. If it rise and almost double in size, then your on the right track. If working on 1 proofing bread like this, your bread should be puff up after the first and only rest period.
- Expiration and Quality of the Flour – The quality of the flour greatly affect the texture of the bread. All-purpose flour could differ from country to country although they are all called as all-purpose flour. Sometimes it depends on the brand too. The closer the flour to expiration date or if it is already expired, the flour could tend to be drier, which means it would require more liquid than mentioned in the recipe. This is a common issue of way sometimes the dough tend to be tough and dry. This is why sometimes you have to add few more tablespoon from the suggested flour measurement to get the right texture. The dough should be soft, smooth and elastic. If it is too wet, add a bit more flour until it is no longer to sticky to handle. If it is too dry, a small amount of liquid helps provide moisture to the dough. A clean side of the bowl, with the dough slightly sticking at the bottom, a soft, smooth and elastic dough is what You are aiming for.
These are the 6 common points that I remind myself when making homemade bread. Bear this in mind and you’ll sure to have a nice soft homemade bread.
How do I Know if I Made the Bread Dough Correctly?
This is not written on the stone, but so far this is how I check if I am on the right track when it comes to the dough.
- Activating the Yeast – This is the first thing that you should get right, otherwise do NOT proceed. After 5 – 10 minutes you should see a foam forms on top of the water, this is an indication that the yeast is alive. If you do not get this, either the yeast is old or the liquid temperature is too hot or cold. The temperature should be 100F – 110F, lukewarm but not hot.
- Clean Bowl After Kneading – The sides of the bowl should be clean, while the bottom is slightly sticking to the dough. This means that amount of liquid to the flour is correct. Enough to make a clean bowl and still make a slightly wet dough.
- Soft Dough – Soft dough means the amount of flour to liquid is enough. Too much flour could make the bread dense and heavy, and too much liquid could make it too wet. Both will affect how the bread rise in the rest period. Try to push your fingers in the dough, it should leave a “dimple” on the dough and should gradually disappear.
- Smooth Dough Surface – Again, this is a sign of correct flour to liquid ratio. A “bumpy” surface could mean that the dough is dry and tough.
- Elastic Dough – A soft dough is usually elastic. If your dough is dry and tough, it wouldn’t be as elastic when you pull it apart.
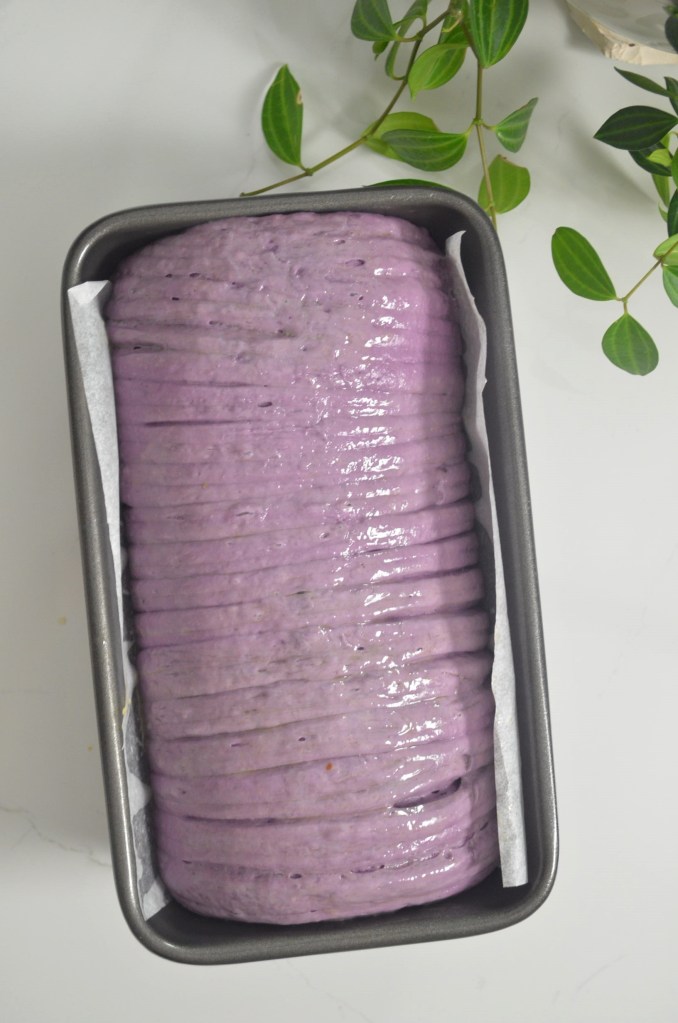
- Rest Period – The dough should almost double in size. This is a sign that the activation of the yeast work which is crucial to making a soft and fluffy bread. This also means the yeast is alive (not yet expired) and the liquid temperature is correct. I always use baking thermometer to check the temperature of the liquid. The bread dough should be really puff up and should fill in the gaps between each bread. This is crucial and the final state of the bread before baking. If you are able to make it puff-up, that is a good sign that there are air trapped inside which will make the bread fluffy.
Now that we have a background about Yeast and tips for, bread making, let’s check the recipe.
3 Methods to Make This Dough
- Stand Mixer – This is what I always use when I make this dough. It’s the fastest and easiest method and less manual handling. This is the step outlined below in the instruction – Recommended
- Hand Mixer – Use dough attachment as regular hook attachment will not work. The thick and heavy dough will jam a regular hook attachment. Also, it’s going to be too heavy for the hook attachment to mix the dough
- Manually – If you don’t have any electronic baking equipment for making the dough, you can do it manually. Simply follow the same instructions, do the mixing in a large bowl and transfer in counter top and knead manually. It will take a lot of arm exercise, but I’m telling you, it’s worth it

Tips in Making Purple Yam Wool Bread
- Bake the Purple Yam – I highly recommend baking the purple yam rather than boiling it. Boiling will add more moisture/water to the purple yam that could make the dough wet. If you end up with a wet dough, you have to gradually add more flour to get it to the right texture, which is soft, smooth and elastic.
- If you do not have time to bake the purple yam, you can boil it as a shortcut, just make sure to squeeze excess water.
- Grate or Use Potato Ricer to mash the purple yam potato. This produces better texture, with minimal chunks. Do not use blender or food chopper as it could make the consistency almost liquidy. That could make the dough to wet, and you will need to add more flour.
- Try to remove and squeeze as much moisture you can get out of the purple yam potato. I like to lightly squeeze it and to remove water and have it transferred in a bowl with paper towel. The paper towel will absorb the moisture
- Baking Pan affects baking time
- If using metal pan, this should be easier to handle as it distributes heat evenly. Th only thing you have to note here is dark metal pans produces darker bake products as it absorb heat faster than light colored pan. Again, just cover the top with aluminum foil. Check the bread at 20 minutes time as baking time could also be less when using this type of pan.
- If using glass pan, this is similar to using a ceramic pan but is more challenging to work with. If you can avoid using glass pan, do so.
Ingredients:
- 100ml Milk any percentage (warmed at 110F) or microwave for 20 seconds
- 1 1/4 teaspoon Active Dry Yeast
- 3 1/2 tablespoon granulated Sugar (Divide: 1/2 teaspoon for yeast and 3 tablespoon for the dry ingredients)
- 1 large Egg – room temperature
- 70 grams cooked Purple Yam
- 40ml Condensed Milk
- 300 grams/ 2 1/8 cup Bread Flour or All-Purpose Flour
- 1 teaspoon table Salt
- 30 grams /1/8 teaspoon unsalted Butter
- 70 grams grated Cheddar Cheese
Instructions:
- Prepare the Mashed Purple Yam :Bake the purple yam at 350F for 45 minutes or until soft enough to mash. Let cool, remove the skin and mash using cheese grater or potato masher. Transfer in a bowl lined with paper towel. Light press to remove excess water. Set aside to cool while you prepare the yeast.
- Activate Yeast: Microwave the milk for 20- 25 seconds until lukewarm but NOT hot, aim for 110F. If you have a baking thermometer, use it as it is the best way to be sure of the temperature. Hot milk will kill the yeast and the bread will not rise properly. Transfer milk in bowl of stand mixer (Refer to discussion above for other Methods of making this) and add 1/2 tsp of the granulated sugar and stir. Add the yeast and let rest for 10 minutes until mixture is foamy. If the mixture did not become foamy, either the yeast is old or the milk is too hot. Do NOT proceed until corrected, otherwise you will end up with a tough dense bread
- Add Wet + Dry Ingredients: Set the mixer with paddle attachment. Add the remaining sugar (3 tbsp), egg, mashed purple yam, all-purpose flour, sugar and salt. Allow mixture to knead on medium-low speed about 15 minutes until smooth and elastic. If the dough is too sticky add 1 tbsp of flour at a time until the dough comes together, the dough should be slightly sticky, smooth, soft and but not too dry. If too much flour is added, the rolls will be dense and heavy. A good measure of correct texture is a clean mixing bowl with slightly sticky bottom, a soft, smooth and elastic dough just like the photo below.
- Add unsalted Butter and knead for another 15 minutes.

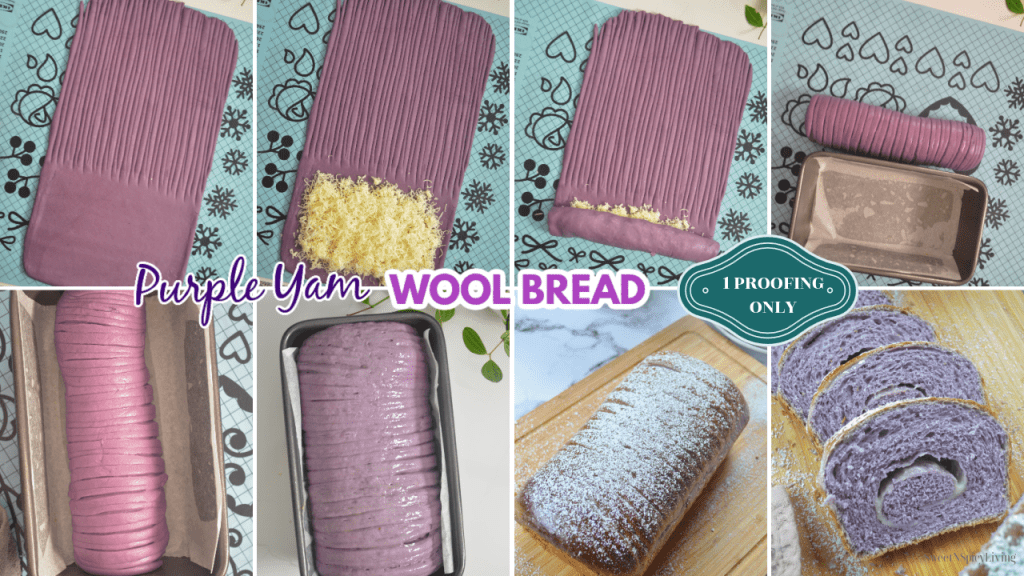
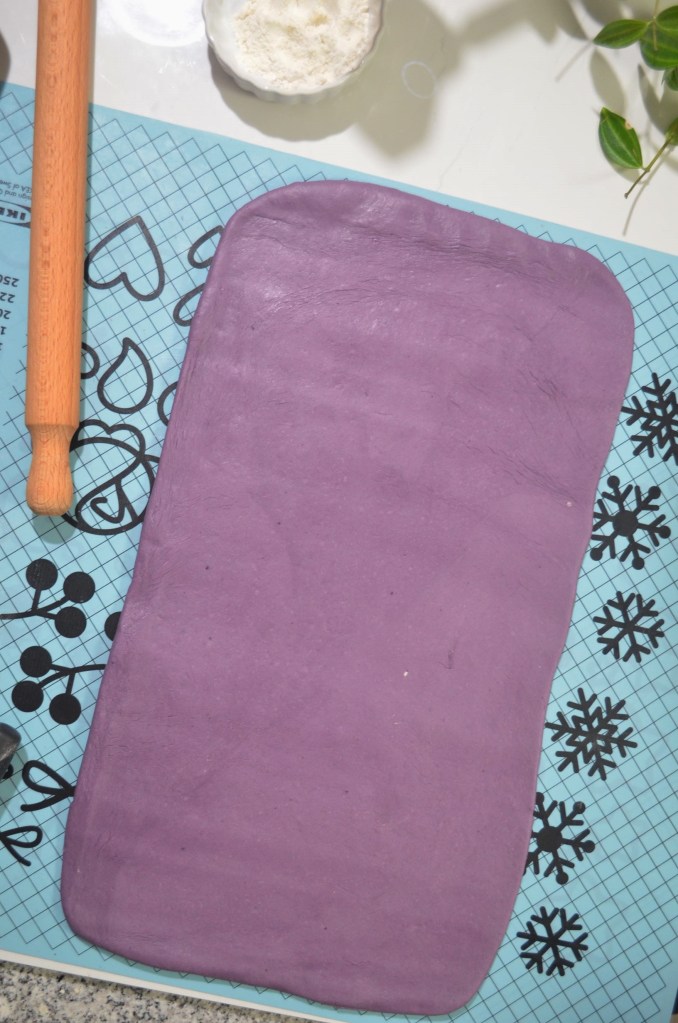
- Shape: Take the dough out from the bowl and lightly push the dough down with the heel of the palm of your hands. Cover and let rest for another 15 minutes. This will make the rolling easier. Roll into a 9 x 13-inch.
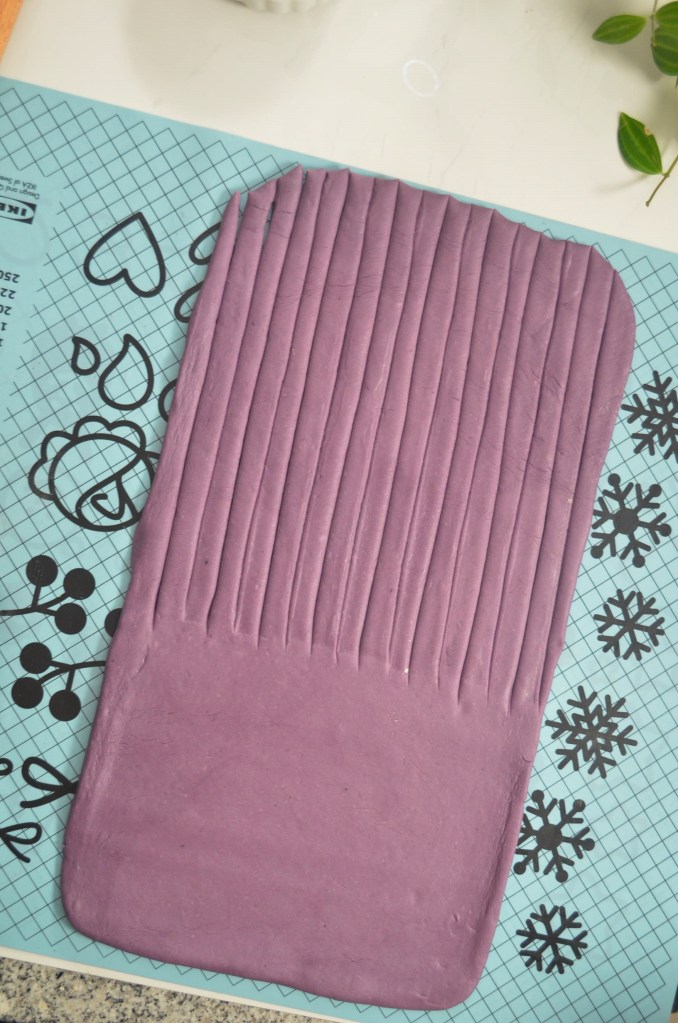
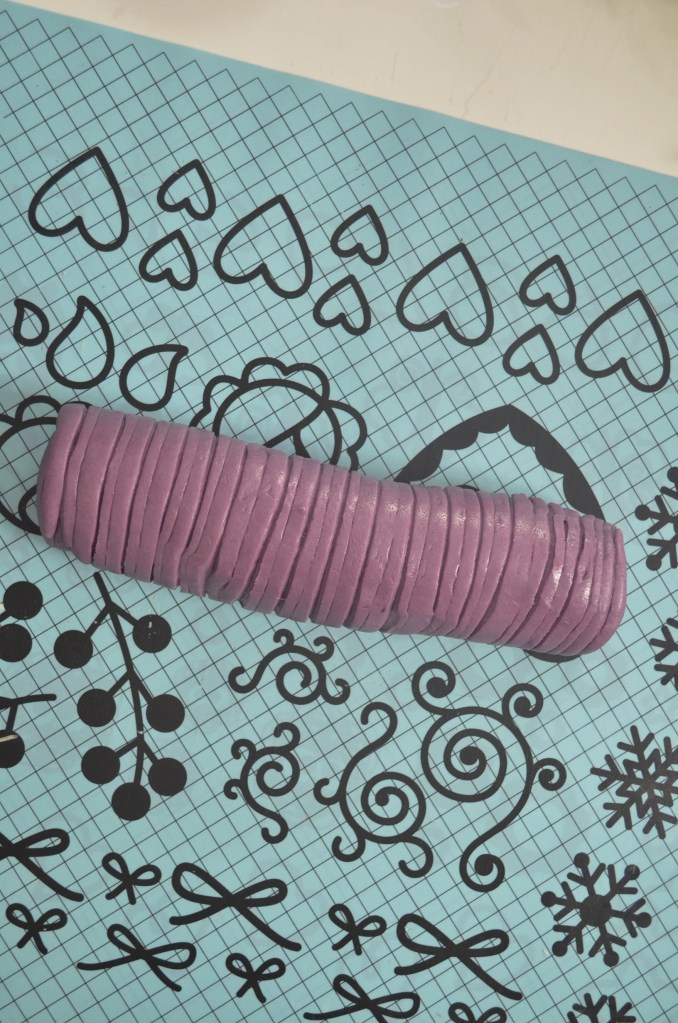
- Cut: Leave a 4-inch allowance on the top. Cut the bottom dough into thin strips leaving the top allowance uncut.


- Cover the allowance at the top with grated cheese.

- Start rolling from the top until the end to form a 9-inch log.

- Arrange in 9-inch Loaf Pan: In a parchment line loaf pan, put the dough.
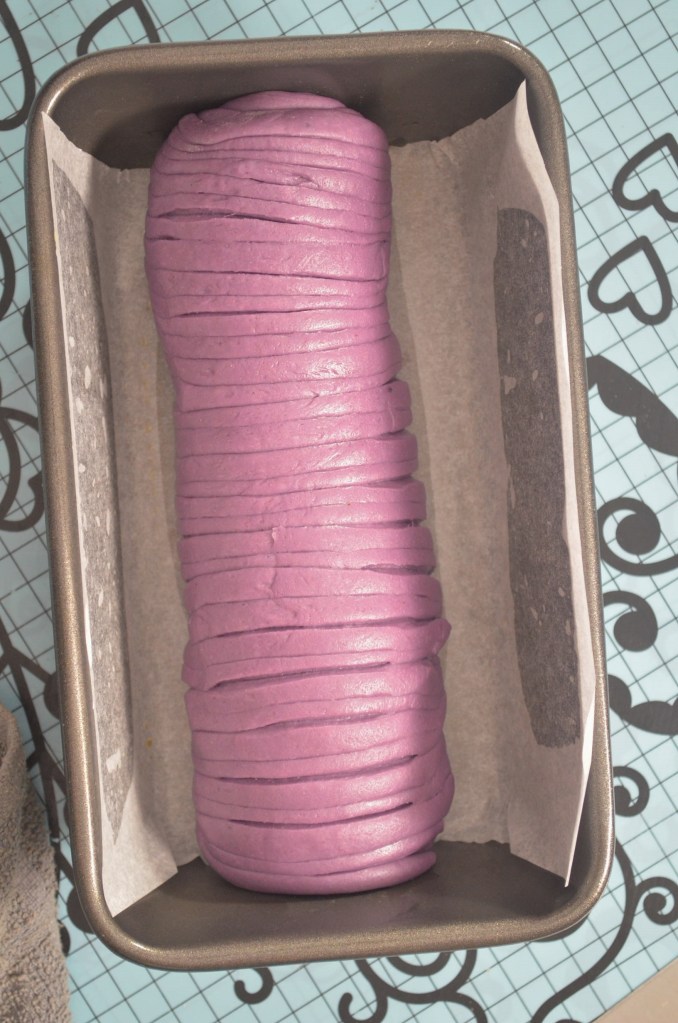
- Rest Period: Cover and let rest in a warm place for another 60 minutes. Preheat oven to 350F during last 15 minutes of dough rising (or however long it took to re-heat your oven)
- TIP: To help the dough rise faster, leave the covered dough OUTSIDE the pre-heated 350F oven. The top of the oven hot surface will give the dough the heat it needed to rise properly. Alternatively, you can also pre-heat the oven to 110F then turn it OFF and put the covered dough inside, just don’t forget to remove it when you pre-heat the oven later.
- Brush top with egg wash ( 1 beaten egg + 1 tsp water). Egg wash helps in the browning and gives a nice glossy texture.

- Bake at 350F in a 9-inch Pan: Bake for 27 – 30 minutes. Remove from the oven at 15 minutes mark and cover the top with aluminum foil to prevent burning the top.
For a plain dinner rolls, check out my All-Around Bread Dough posts
How to Make Dinner Rolls
Featured Posts:
- [VIDEO] Small Batch Dinner Rolls for Two (Makes 4)
- [VIDEO] Jalapeno and Cheese Pull-Apart Bread
- [VIDEO] Kalamata Foccacia Bread
- [VIDEO] Herbed Pull-Apart Jalapeno and Cream Cheese
- Basic White Bread
- Soft Garlic Bread
- [VIDEO] Brioche Hamburger Buns
- Vegan Dinner Rolls
- [VIDEO] Filipino Ensaymada
- Garlic Bread Stick
- All-Around Bread Dough
- Coconut Twist Bread
- Sweet Potato Rolls
- [VIDEO] 10 Homemade Bread Recipe Videos


My Latest Video
Thank You for visiting my website. Please don’t forget to click the “Like” button below if you like this recipe. Lastly, did you know that I have a YouTube Channel? Please support my channel by clicking on the “Subscribe” button in my video and the “Bell” icon to get notification of new videos.

FOLLOW SWEETNSPICYLIVING ON SOCIAL MEDIA
Facebook | Instagram | Pinterest | Twitter | YouTube

