Today is homemade bread day 🙂 Hey! don’t run away, making homemade bread is not as difficult as it sounds. It does takes time, but it is not difficult. The bulk of the hours are spent waiting for the dough to rise but in terms of actual hand work, this require very minimal handling time. Leave it to your stand mixer to do the job and off you go doing other chores.

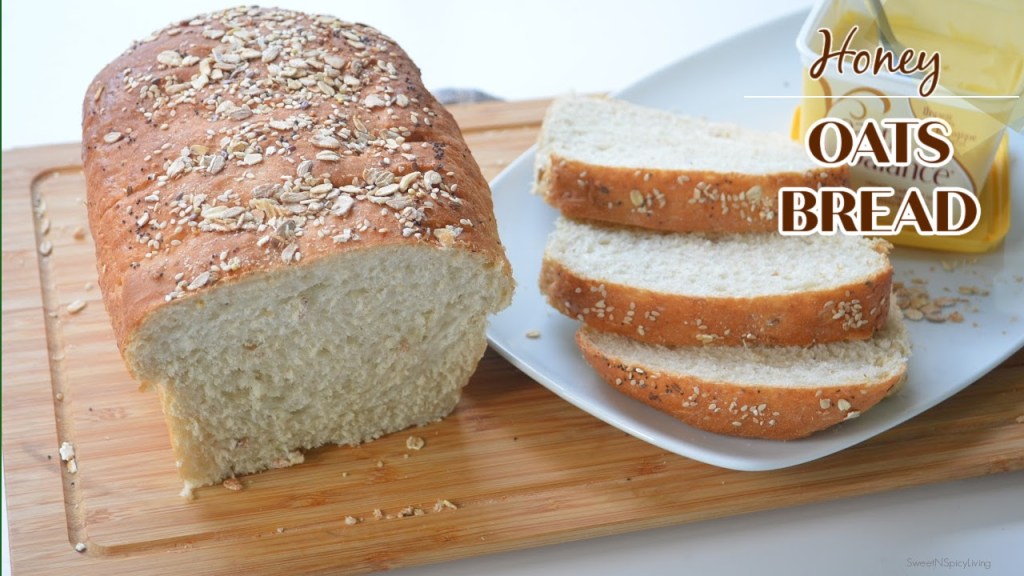
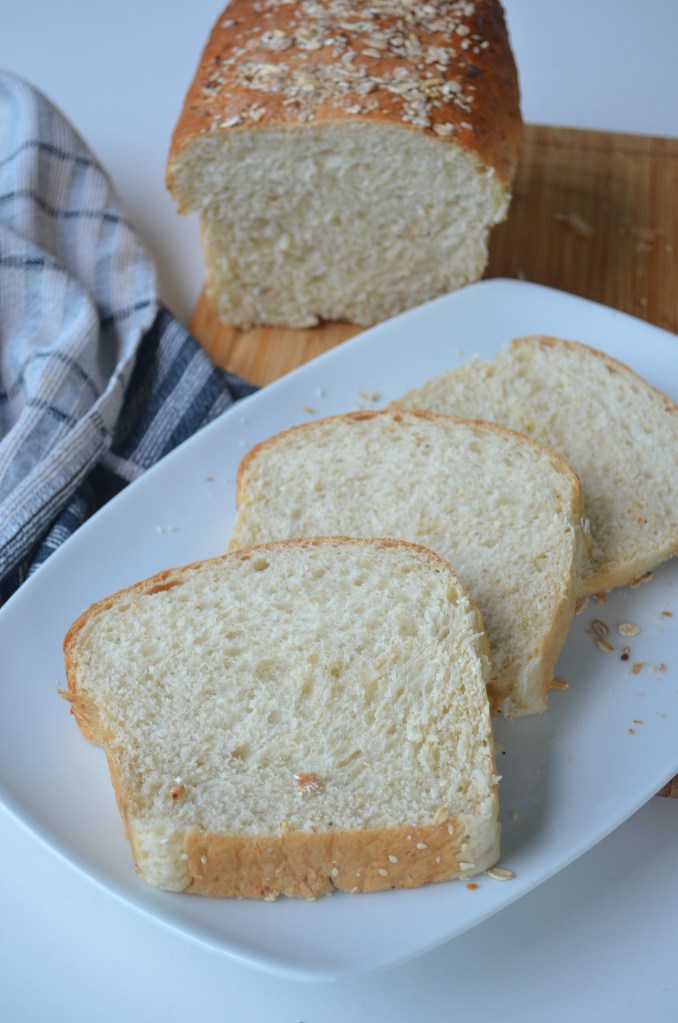
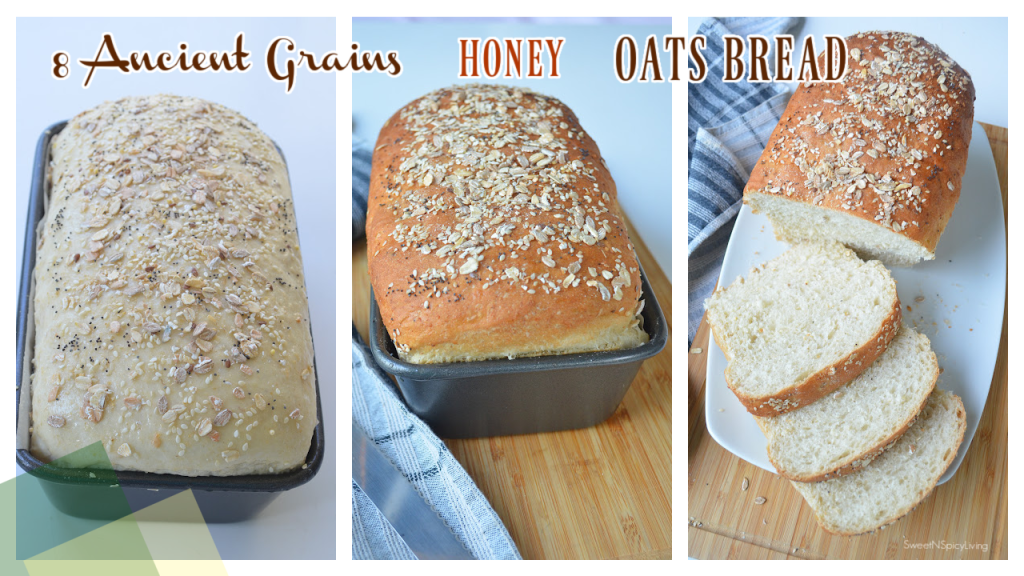
So today I thought I would shar with you my 8 Grains Honey Oats Sandwhich Bread. This is a soft loaf bread with a nice seedy grainy texture from the 8 grains rolled oats mix. If you are not familiar with 8 Grains Ancient Oats, here is how it looks like. This is what I always buy as it has more texture and high fiber content. I used this for both my sweet and savory oatmeal and the texture was always perfect to my liking.
Ancient Grains Rolled Oats
Ancient Grains is an all-natural combination of 8 different grains (Oat, rye, barley, spelt and khorasan flakes, oat bran, millet, flaxseed, quinoa flakes) forming a wholesome blend with a high fibre count.

Make Your Own Blend
If you cannot find this or anything similar to this, you can make your own blend. Simply mix any of the grains and seeds with plain rolled oats. You will need 1/2 cup in total once mix is combined. I haven’t personally done this route as I often keep 8 grains rolled oats for my daily use.
Simply Water
This is where it becomes super basic, all you need is water to bring the dough together. No milk , no egg, just water. It is how basic it is. The small amount of oil and honey is to keep the dough not too dry and dense and to give a little sweetness, but it is water that will really bring the mixture together to form a dough.

No Sugar, Instead Honey or Maple Syrup
To make it sugar free, I used honey to give the bread a slight sweetness, but not too much. Also the honey adds moisture to the bread preventing it to be too dry. Seeded bread have a tendency to be dry as the seeds or grains absorb the liquid. If you want to make it vegan, then switch to using Maple Syrup instead.
Substituting Honey
I guess I have to mention this. Substituting honey for something like Maple Syrup or granulated white sugar will need minor adjustment in the recipe. Maple Syrup is thinner than honey which may require you to add a little bit more flour, either that or use lesser maple syrup (say 3 tbsp) and adjust as needed. If the dough is too sticky, add 1 tbsp of flour at a time until you get to the soft, elastic and slightly sticky texture. On the other hand, if you use granulated sugar in place of honey, you are basically reducing the liquid in the recipe which means you may need to add more water to avoid the dough from getting to dense and dry, or probably reduce the amount of flour and start with 1 1/2 cups first and gradually add the remaining 1/4 cup as needed. I haven’t tried both, but this is how I would probably adjust it If I decided to replace honey with Maple syrup of granulated sugar.
Why Do We Need to Add the Oats with the Yeast While Proofing?
Normally, oats goes with the dry ingredients like flour. But in this recipe, although the rolled oats is just a small portion (1/2 cup) , we are adding it directly to the water while proofing the yeast. This is to give the rolled oats time to soften as it soak the water. Rolled oat is dry and tends to absorb more liquid, having it soaked to soften will lessen the chance of making the bread dry.
Texture of Bread to Expect
This bread is soft and have a nice texture from the grains and seends. It is not as smooth as plain sandwhich bread but it was a welcome change fro me. It is not as dense and chewy, but has a perfect texture for sandwich bread. Since the bread do not use any dairy, it doesn’t have that creaminess, but it does taste good for a Vegan bread. This bread can be use as how you would have used a regular sandwich bread. Even a simple smother of butter on toast is nice but if you want to make it feeling, stack up some veggie and sandwhich feeling of your choice.

Active Yeast vs. Instant Yeast
Because yeast plays a very important role is making this soft and fluffy bread, let’s take few minutes to understand it. What it is, what are the common types of yeast, the difference among the yeast, and what role the yeast do in bread. I normally encounter 2 types of yeast in most recipes, and in the grocery so I decided to focus on this two types of yeast, although there is a 3rd type “Fresh Yeast” but I never used it.
Types of Yeast
- Active Dry Yeast – This and the Instant Yeast are what I used in most of my bread. In terms of appearance and texture, this kind of yeast are coarser and have bigger granules. It requires to be dissolved in warm water with sugar to activate it. It normally takes 5-10 minutes to do this, and you will now that it’s been “awaken” when bubbles starts to form in the surface of the water, and you would be able to smell it too. This last longer in terms of shelf life and should be kept in a cool dry place. I kept mine in the refrigerator.
- Fast Acting or Instant Yeast – In terms of appearance, this kind of yeast have a finer granules as compared to active dry yeast. This does not require to be dissolved in warm water and sugar. This can be mixed directly with the dry ingredients such as flour, just make sure to keep it away from salt when you mix it as salt can kill the yeast when they touch directly with each other. I normally mix the flour, salt and leavener then I add the instant yeast last. This should als be kept in cool and dry place. You basically save 10 minutes of time when you use instant active yeast as you skip the activation process.
Interchanging Yeast
You can interchange active yeast and instant yeast in the recipe, I sometimes do this when I have the other and the recipe calls for the other. You just have to be mindful of the measurement. For dry active yeast you generally need to use half the quantity of fresh yeast stated in the recipe and for instant yeast you need to use 1/4 of the quantity of fresh yeast. The fresh yeast has higher measurement, followed by active yeast, then instant yeast. Let’s say the recipe calls for 30g (1 ounce) of fresh yeast, you can substitute it with 15g (.5 ounce) active dry yeast, or 7g(.25 ounce) instant yeast. Just don’t forget the when you substitute instant yeast with dry active yeast, you have to dissolve it first in warm water to activated it. Do not just mix it along with other dry ingredients unless specified in the recipe.
So, now that’s the basic of yeast. Let’s have a look at some very important tips that we should bear in mind in making yeast bread.

Tips for a Successful Soft Homemade Bread
- Liquid Temperature – Yeast grows in temperature between 110 – 115F, so its important to have the water that you are using to “proof” it in this range. If you go lower or higher, the yeast might not proof properly. That means the bread will not rise as much, resulting to a flat and tough bread.
- Check Yeast Expiry a Date – you might be wondering how come the bread did not rise when you followed exactly the recipe. Well, first thing first, make sure the yeast is not yet expired.
- Amount of Yeast – Just because you want a tall bread doesn’t mean you have to put as much yeast in the mixture. Sometimes if you add too much, it will have a tendency to collapse. Just imagine putting more air than what is needed in a balloon, the balloon will explode. The same case with bread.
- Right Type of Yeast – We’ve discussed the 3 types of yeast above. Make sure to use the right one for your recipe, and make necessary adjustments if you want to swap one from another.
- Rest Period – Yeast bread needs time to rise. There are bread that uses less yeast but requires more rest time, the likes of No Knead Bread or Artisan Bread which usually require 8- 16 hours rest period to get the volume and to develop the flavor. There are 1 hour bread like my Rosemary Dinner Rolls which used this same bread dough. The point is, give it time to rest, don’t touch it just leave it in a warm place. The first rest period will normally tell you if your dough is good or not. If it rise and almost double in size, then your on the right track.
These are the 5 common points that I remind myself when making homemade bread. Bear this in mind and you’ll sure to have a nice soft homemade bread.
Featured Video: All-Around Sweet and Savory Bread Dough
Now that we have a background about Yeast and tips for, bread making, let’s check the recipe.
4 Methods To Make This Dough
There are 4 ways that you can choose from in how you make this bread. Choose whichever works for you.
- Stand Mixer – This is what I always use when I make this dough. It’s the fastest and easiest method and less manual handling. This is the step outlined below in the instruction.
- Hand Mixer – It’s doable but I never used it because I don’t have a dough attachment. Important point to remember, use DOUGH attachment, a regular hook attachment will not work as it will be jammed with dough. Also, it’s going to be too heavy for the hook attachment to mix the dough.
- Manually – If you don’t have any electronic baking equipment for making the dough, you can do it manually. Simply follow the same instructions, do the mixing in a large bowl and transfer in counter top and knead manually. It will take a lot of arm exercise, but I’m telling you, it’s worth it.
- Bread Machine – If you happen to have one, use the dough setting. Add all the wet ingredients first, followed by all dry ingredients. Remove the dough after the 3rd rise and shape and fill then bake in the oven. Do not forget to remove the dough otherwise it will continue into the bake stage. Check on the 2nd rise to see if you need to add more liquid or flour, add as needed.
Ok, now let’s go and put all these pointers to work. Let’s make your first (or maybe not) homemade bread dough. At the end of the recipe, I’ll add links to recipes where I used this dough, or recipes where you could substitute this dough. Let’s get started
Ingredients:
- 3/4 cup Warm Water (110F)
- 1 1/4 teaspoon Active Dry Yeast
- 4 tablespoon Honey
- 3 tablespoon Flavorless Oil
- 2 cups Bread Flour
- 1/4 cup 8 Grains Rolled Oats (or plain Rolled Oats)
- 3/4 teaspoon table Salt
Instructions:
- Activate Yeast: In the bowl of an electric stand mixer (Refer to discussion above for other Methods of making this) whisk together water, honey and rolled oats. Rest 15 minutes until mixture is foamy.
- Add Wet Ingredients: Set mixer with paddle attachment and add oil.
- Add Dry Ingredients: Add bread flour and salt. Knead on low-speed until combined, then switch to a hook attachment. Allow mixture to knead on medium-low speed until smooth and elastic , about 15 minutes. Pay close attention to the texture of the dough. If the dough is too sticky add 1 tbsp of flour at a time until the dough starts to form, dough should be slightly sticky and not too dry. If too much flour is added the bread will be dense and heavy. A good measure of correct texture is a clean mixing bowl.

4. First Rest Period: Remove the dough and form into a ball. Transfer into a greased bowl and cover bowl with plastic wrap or warm towel and allow to rest for 1 hour or almost until double in size
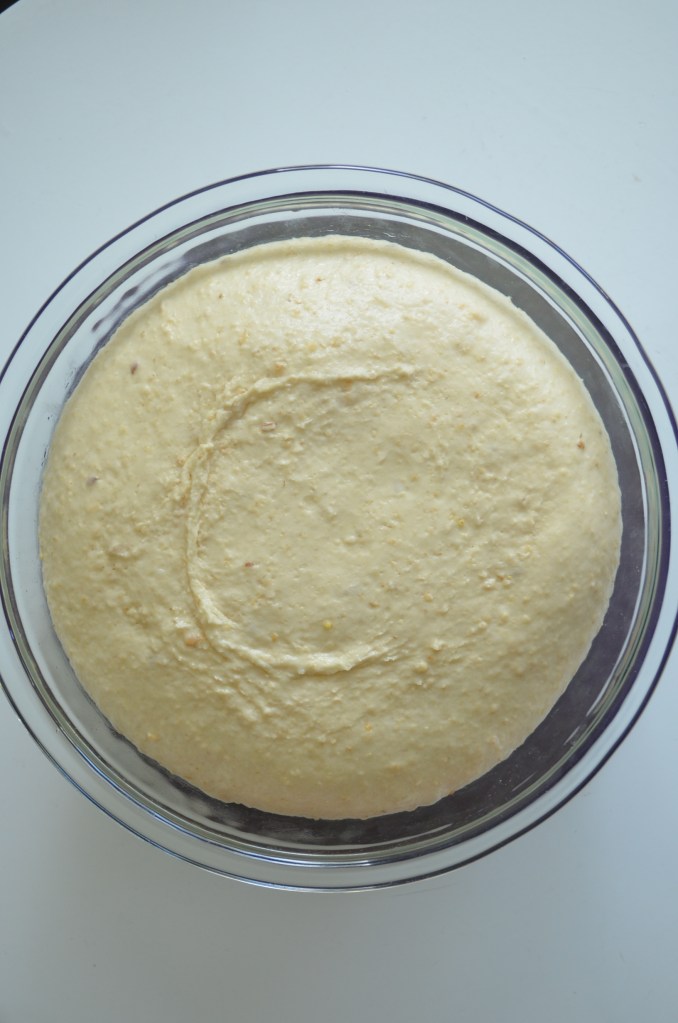
TIP: To help the dough rise better, pre-heat the oven to 110F then turn it OFF. Leave it inside the oven for 1 – 1/2 hour or until double in size. Some oven has a proofing setting, mine doesn’t, so this is my trick.
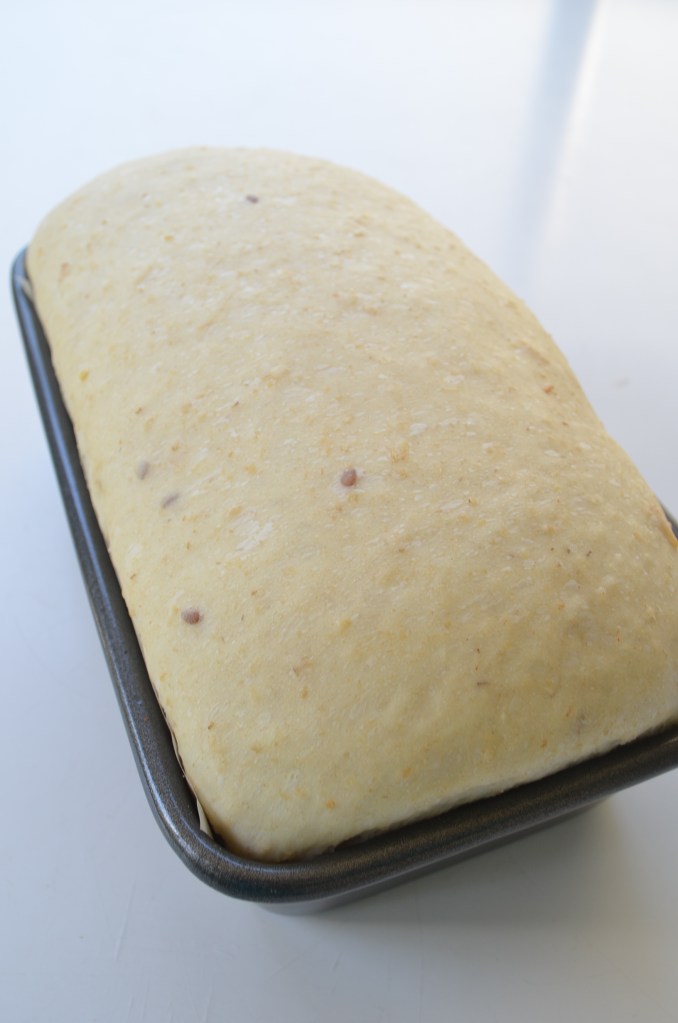
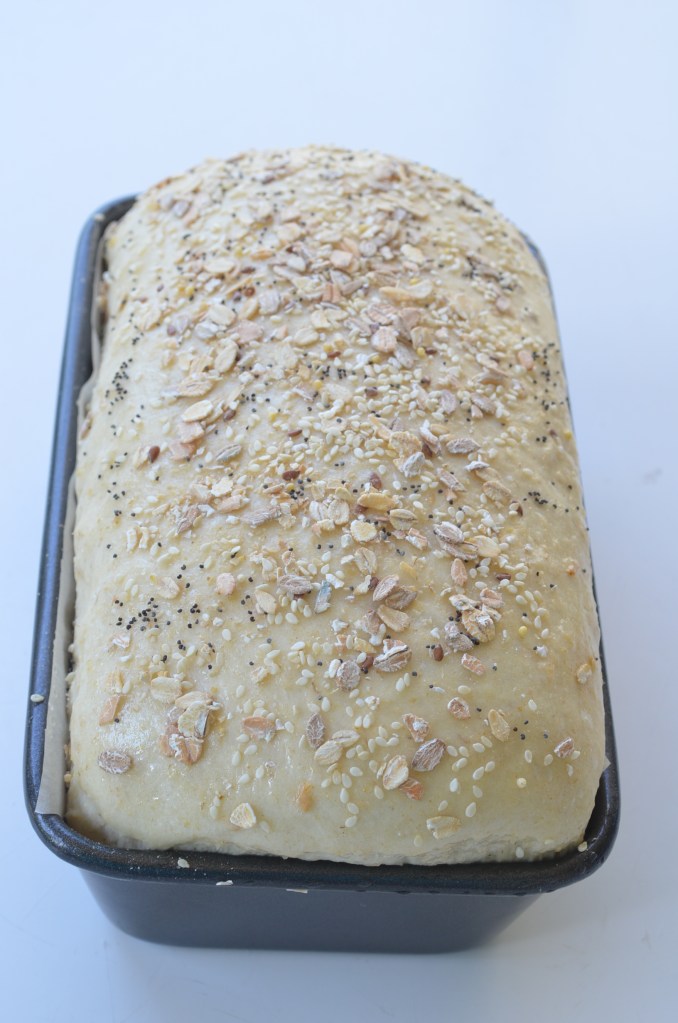
5. Shape and Prepare for 2nd Rest Period: Take the dough out from the bowl and lightly push the dough down with the heel of the palm of your hands. Flatten and roll the dough to about 8×22 inch rectange. Roll into a log about 7-inch long. Arrange in a 9-inch loaf pan.

6. 2nd rest Period: Cover and let rest in a warm place for the second time for 1 1/2 hour or until the dough rises at least 1-inch above the rim of the pan.
7. Preheat oven during last 15 minutes of dough rising. If you are using the oven to store the dough, do NOT forget to take it out before pre-heating the oven.
8. Brush top with honey. Mix 1 teaspoon honey + 1/2 teaspoon water and brush the top. Sprinkle top with 1 teaspoon of 8 grains rolled oats or any desired seed toppings. Honey is needed to make the top sticky so the toppings will stick.
- Alternatively, you can also brush the top with eggwash (if you do not mind cracking an egg just for that). Add 1 teaspoon water to agg and beat.
9. Bake for 35 – 40 minutes or until the top has turned golden brown. If the top is turning brown too fast, simply cover it with aluminum foil.

10. Let cool for 5 minutes in the pan then remove and transfer in a cooling rack. Do NOT leave the bread in the pan as the remaining heat from the pan could create a steam that will make the base of the bread wet.
Latest Posts:
- NO BAKE | Small Batch | Pistachio and Cranberry White Chocolate Truffles
- Big Batch Jalapeno Cheese Babka: A Flavorful Twist
- [VIDEO] Nutty, No-Fuss Biscotti: A Loaf-Pan Twist on a Classic Crunch
- Easy Almond Lace Cookies (Florentine Cookie)
- [VIDEO] Essential Tips for a Stylish Charcuterie Box
My Latest Video:
Featured Posts:
- Simplified & Easy Everything Bagel
- Small Batch Focaccia Bread
- 2 Ingredients NO Yeast Bread Rolls
- Jalapeno and Cheese Pull-Apart Bread
- [VIDEO] All Around Bread Dough: One Bread Dough, Unlimited Variations
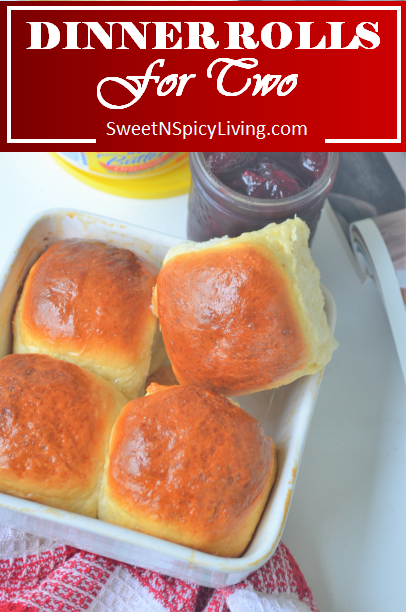
- Small Batch Dinner Rolls for Two (Makes 4)
- Homemade White Bread Loaf
- Jalapeno Cheese Pull-Apart Bread
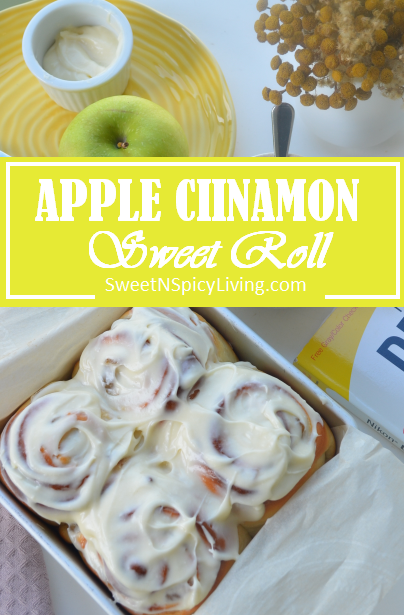
- Small Batch Apple Cinnamon Roll (Makes 4), BEST Ever!
- Small Batch Honey Pumpkin Bread (Makes 6)
- Small Batch Simplified Jalapeno Cheddar Cheese Bagel, Quick and Easy!
- Garlic Bread Stick


Thank You for visiting my website. Please don’t forget to click the “Like” button below if you like this recipe. Your feedback helps me decide what to put on my next baking to do list. Lastly, did you know that I have a YouTube Channel? Please support my channel by clicking on the “Subscribe” button in my video and the “Bell” icon to get notification of new videos.
FOLLOW SWEETNSPICYLIVING ON SOCIAL MEDIA
Facebook | Instagram | Pinterest | Twitter | YouTube
Share this:

Categories: Baking, Bread, Healthy Option, Recipe, Vegan, Video, Video Recipes
