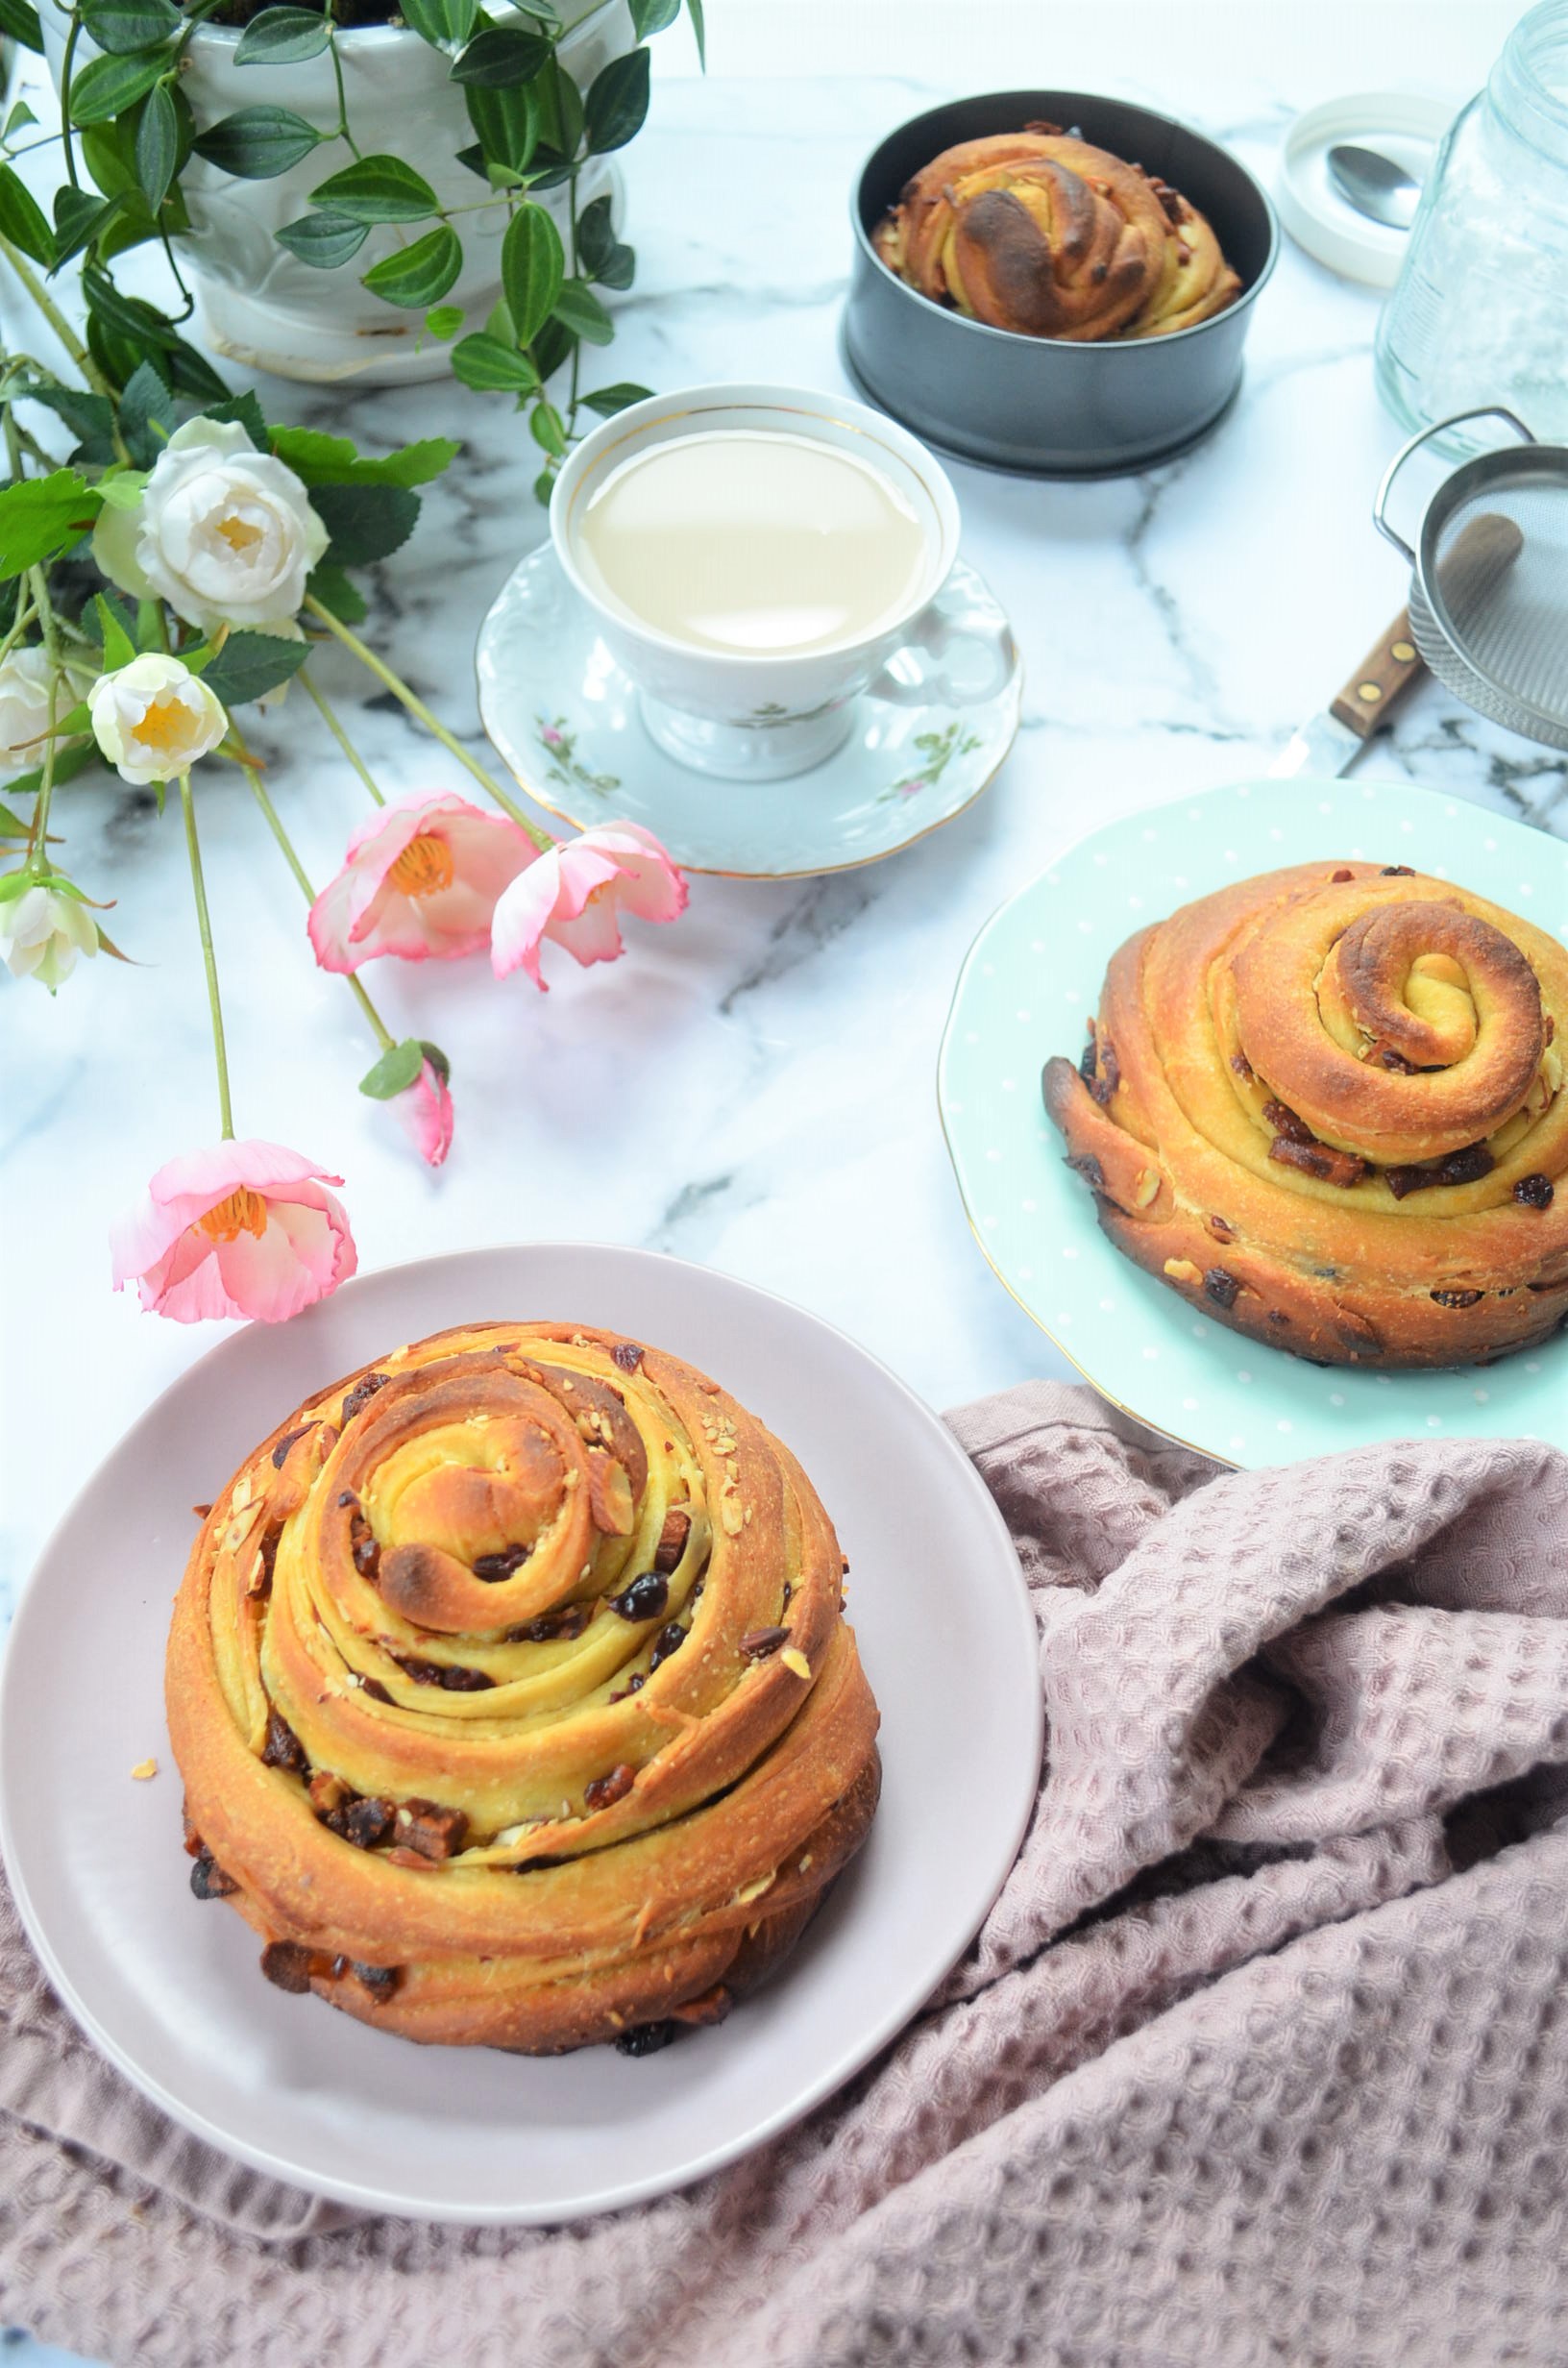
I have something special and delicous for us to try today, Almond Wreath Bread. A bread with a crunchy side and soft interior topped with sliced almonds and filed with homemade frangipane. I’ve said this again and again in a lot of my post .
When it comes to baking, I love breadmaking among anything else. Yeah, they do take time, but for me it is alwasy worth once I took them out of the oven. This bread is a small batch for 2 but it is totally worth the time and effort. I am happy and proud to share this recipe with you.
Read more: [VIDEO] Almond Wreath Bread: A Delightful Treat for Every Occasion
This recipe makes 2 large wreath bread which is perfect for sharing or for keeping. Let’s talk more about it.
What is Almond Wreath Bread?
Almond Wreath Bread is more than just a bread—it’s a showstopper! This beautiful bread is shaped like a wreath and packed with the sweet, nutty flavor of almond paste or frangipane. Whether you serve it as two large pieces or one giant wreath, it’s perfect for sharing.

Small Batch, Big Impact
This recipe makes just two large breads, but don’t let the small batch fool you. Each piece is big on flavor and makes an impressive centerpiece. If you’re feeding a crowd, you can also combine the dough into one grand wreath and make a grand bread center piece. I personally like making this in 2 portions. It is easier to share and each one gets equal share 🙂

Basic Ingredients, Endless Possiblities
The dough is simple—using ingredients you likely already have in your pantry. We are talking about flour, milk, sugar, yeast and salt. I intentionally made this dough without eggs, because as we are all aware, eggs are getting expesnive now a days. You can even make this vegan by substituting water for milk, how great is that? But don’t let its simplicity fool you; it’s incredibly versatile. Once you master this dough, you can use it for other bread variations, like cinnamon rolls or savory stuffed loaves.
What is Frangipane Paste/Almond Paste
Let’s talk about the filling for this bread, Frangipane Past is a mix of butter, sugar, egg, vanilla extract and almond flour. It is no too sweet, somewhat smooth, thick with a rich nutty almond flavor. You’ll find it in desserts like almond croissants and marzipan-filled pastries or tarts. In this bread, frangipane adds a soft, buttery almond filling that melts in your mouth.

Versatile Filling Ideas
Frangipane is the stars here, but you can get creative. Use chocolate or jam spread, add chocolate chips or even a touch of citrus zest to your filling for a twist. Frangipane and chocolate sprwad are my 2 favorite filling, both will not disappoint you. Give them both a try.

An Everyday Treat
They look beautiful and fancy like something you will only make for when there is an occasio, bunot really. This bread is a treat you’ll want to enjoy daily. It’s perfect for breakfast with coffee, as an afternoon snack, or even as a dessert. The light sweetness and nutty filling make it a go-to recipe anytime. I am teling you, once you try making it, it will end up as favorite in your household.

Special Treat for Easter Celebration
I know I said this is a good everyday bread, but if you are looking for an Easter Bread to make, I will highly recommend this. Almond Wreath Bread truly shines during Easter. Its wreath shape makes it a fitting addition to the holiday table, symbolizing renewal and togetherness. Plus, it’s a unique alternative to classic Easter cakes. You can make colored hard boiled eggs and put them in a middle for an attractive Easter looking bread.

A Feast for the Eyes
Not only does this bread taste great, but it looks stunning too. The wreath shape and golden color make it Instagram-worthy. A sprinkle of powdered sugar or drizzle of icing adds that finishing touch. I like to keep mine simple and I used dusting of icing sugar to elevate the look. The thin sliced toasted lamonds on top with the sprinkle of icing sugar made this bread trully eye catching. Something that you would want to eat once you lay your eyes on it.

Tips for a Successful Soft Homemade Bread
Making Almond Wreath Bread is easier than it looks. Don’t be intimidated by the fancy shape—it’s all about having fun and experimenting. You will thank yourself once you try it. Let me know if you give it a try. let’s get baking!

Tips for a Successful Soft Homemade Bread
- Liquid Temperature – Yeast grows in temperature between 105 – 110F, so its important to have the water that you are using to “proof” it in this range. If you go lower or higher, the yeast might not proof properly. That means the bread will not rise as much, resulting to a flat and tough bread.
- Check Yeast Expiry a Date – you might be wondering how come the bread did not rise when you followed exactly the recipe. Well, first thing first, make sure the yeast is not yet expired. Expired yeast is the common reason for flat and dense bread. If your bread did not expand or rise during the rest period, it is most likely that the yeast is not fresh or the water temperature is too hot or cold.
- Amount of Yeast – Just because you want a tall bread doesn’t mean you have to put as much yeast in the mixture. Sometimes adding too much yeast can cause the bread to collapse during the rest period. Just imagine putting more air than what is needed in a balloon, the balloon will explode. The same case with bread.
- Right Type of Yeast – We’ve discussed the 3 types of yeast above. Make sure to use the right one for your recipe, and make necessary adjustments if you want to swap one from another.
- Rest Period – Yeast bread needs time to rise. There are bread that uses less yeast but requires more rest time, the likes of No Knead Bread or Artisan Bread which usually require 8- 16 hours rest period to get the volume and to develop the flavor. There are 1 hour bread like my Rosemary Dinner Rolls which used this same bread dough. The point is, give it time to rest, don’t touch it just leave it in a warm place. The first rest period will normally tell you if your dough is good or not. If it rise and almost double in size, then your on the right track.
- Expiration and Quality of the Flour – The quality of the flour greatly affect the texture of the bread. All-purpose flour could differ from country to country although they are all called as all-purpose flour. Sometimes it depends on the brand too. The closer the flour to expiration date or if it is already expired, the flour could tend to be drier, which means it would require more liquid than mentioned in the recipe. This is a common issue of way sometimes the dough tend to be tough and dry. This is why sometimes you have to add few more tablespoon from the suggested flour measurement to get the right texture. The dough should be soft, smooth and elastic. If it is too wet, add a bit more flour until it is no longer to sticky to handle. If it is too dry, a small amount of liquid helps provide moisture to the dough. A clean side of the bowl, with the dough slightly sticking at the bottom, a soft, smooth and elastic dough is what You are aiming for.

How do I Know if I Made the Bread Dough Correctly?
- Activating the Yeast – This is the first thing that you should get right, otherwise do NOT proceed. After 5 – 10 minutes you should see a foam forms on top of the water, this is an indication that the yeast is alive. If you do not get this, either the yeast is old or the liquid temperature is too hot or cold. The temperature should be 100F, lukewarm but not hot.
- Clean Bowl After Kneading – The sides of the bowl should be clean, while the bottom is slightly sticking to the dough. This means that amount of liquid to the flour is correct. Enough to make a clean bowl and still make a slightly wet dough.
- Soft Dough – Soft dough means the amount of flour to liquid is enough. Too much flour could make the bread dense and heavy, and too much liquid could make it too wet. Both will affect how the bread rise in the rest period. Try to push your fingers in the dough, it should leave a “dimple” on the dough and should gradually disappear.
- Smooth Dough Surface – Again, this is a sign of correct flour to liquid ratio. A “bumpy” surface could mean that the dough is dry and tough.
- Elastic Dough – A soft dough is usually elastic. If your dough is dry and tough, it wouldn’t be as elastic when you pull it apart.
- First Rest Period – The dough should almost double in size. This is a sign that the activation of the yeast work which is crucial to making a soft and fluffy bread. This also means the yeast is alive (not yet expired) and the liquid temperature is correct. I always use baking thermometer to check the temperature of the liquid.
- Second Rest Period – The bread dough should be really puff up. This is crucial and the final state of the bread before baking. If you are able to make it puff-up, that is a good sign that there are air trapped inside which will make the bread fluffy.

Why is My Dough too Wet or too Dry?
Don’t get frustrated if your dough did not turn out immediately as what you see in the photo or video. Most likely It is not because you did not follow the recipe. When it comes to bread making, the amount of flour and liquid is not always 100% precise. This is why often times you will encounter recipes that says, if your dough is dry, add a bit more liquid. If your dough is too wet, add a little bit more flour. This instructions are not meant to confuse you, they are meant to guide you on how to adjust as you work through your dough. The reason for this is that although the measurement of water and flour are specified in the recipe, it still could slightly vary depending on many factors.

For instance, all-purpose flour could very from country to country, or even from brand to brand. Don’t be surprise if you find that some brand tends to require a bit more liquid as the others. On top of this, the amount of liquid is also affected by the state of your flour. How old is the flour that you are using? Older flour nearing expiry tends to be drier and this requires more liquid. Humidity also affects baking. The more humid it is, the more likely the dough will be sticky and wet. Bread making requires patience, and practice. Once you learn how to feel the right texture of the dough, everything will be quick and easy. You can instantly tell if you need to add more water or flour to get the dough in right state.
How to Make Almond Wreath Bread

Ingredients:
- 1 teaspoon Active Yeast (or 3/4 Instant Yeast)
- 7 – 8 tablespoon warm Milk (110F)
- 1 tablespoon Flavorless Oil
- 1 1/2 teaspoon greanulated Sugar ( 1/2 tsp for activating the yeast)
- 1 cup Bread Flour
- 1/2 teaspoon Sea Salt
Filling:
- 1/4 cup Unsalted Butter
- 1/4 cup Powdered Sugar
- 1/4 teaspoon table Salt
- 1 Egg Yolk OR 2 tablespoon of whole beaten Egg
- 1/2 teaspoon Vanilla Extract
- 1/2 cup Almond Flour
- 1/4 cup Sliced Almond ( + 2 tablespoon extra for toppings)
Instructions:
- Activate the Yeast: Pour the warm in the mixing bowl. Add 1/2 teaspoon sugar and stir. Add active dry yeast, stir and leave for 10 minutes to bloom.
- If using instant yeast, mix the yeast with the dry ingredients. No need to activate it.
- Add Wet Ingredients: Ad the oil.
- Add Dry Ingredients: Add the bread flour, sugar and salt.
- Knead for 15 minutes (speed 2 kitchenAid stand mixer) until the dough comes together and is still slightly sticking to the bottom of the bowl. If you notice that the dough is dry, add 1/2 teaspoon of water and conitnue kneading at least 3 minutes after every addition of additional water.
- To Check: The dough should be smooth, soft, elastic and slightly sticking to the bottom of the bowl
- Let Rest 1st Time: Place the dough in a greased bowl, turning it to coat with oil. Cover loosely with plastic wrap or warm towel, and then let rise in a warm place for about 1 hour, or until doubled. (Rising time is dependent on the temperature of the room; let rise until the dough is doubled).
- Pre-heat the oven to 110F then turn it OFF. Put the covered dough inside for 1 hour.

- Make the Almond Paste: In a bowl, transfer to softened butter. Add the powdered sugar and mix until smooth and well combined. Add the egg yolk or 2 tbsp beaten egg into the butter and sugar mixture. Add pure vanilla extract and conitnue mixing. Add the almond meal and stir again until it forms into a loose almond paste mixture. Set aside in room temperature.
- TIP: Do NOT refrigerate as it will harden and will make spreading it challenging.

- Divide the Dough: Remove the dough from the bowl. At this stage, the dough shoud have doubled in size. Lightly knead the dough to knock out the air. Divide the dough into 2 portions.

- Fill the Dough wth Almond Paste: Roll each dough portion into a 10 x 10-inch size. Divide the almonnd filling to 2 portion and fill the center of each dough.

- Sprinkle sliced almonds on top. No need to toast the almond as they will get toasted as it bakes.

- Starting from the end close to you, roll the dough. Pinch both ends to seal completely. You should end up with a log shaped dough around 10-inches.

- Using your palm, roll the dough to stretch it to about 12-13 inches in length.

- Using a sharp knife, cut the dough into 2 leaving at least 1-inch allowance on top that is not cut. This will help hold the 2 strips together.

- Twist each piece together.

- Shape into a circle wreath making sure to pinch and seal the connecting ends.

- Let Rest 2nd Time: Arrage each filled dough side by side in a baking sheet. Cover anf place in a warm place to rise for another 60 minutes. They will be puffy when ready, if needed extend extra 30 minutes until the bread is fully puff-up.

- Brush the top with egg wash ( beaten egg + 1 teaspon water). Sprinkle more sliced almonds on top, as much or less as you like.

- Pre-heat the Oven: Meanwhile, preheat the oven to 350F in the last 10 minutes of 2nd rest time. If you are using the oven to rest the dough, do NOT forget to take the dough out before pre-heating.
- Bake for 15 minutes in the lower rack, until deeply golden brown. Remove from the oven and move to the center rack. Cover the top with aluminum foil. Bake another 5 mminutes.

- Let Cool at least 10 – 15 minutes to allow the bread texture to get better. This is a MUST, otherwise the bread will still be wet when you serve it staright from the oven.

Enjoy! If you make this, share and tag me in Instagram #SweetNSpicyLiving. I would like to see your creations too.
Featured Posts:
- [VIDEO] Jalapeno & Cheese Monkey Bread
- Italian Easter Bread
- [VIDEO] 1 Proofing Soft & Fluffy Bread Rolls
- [VIDEO] Cheese Bread Stick
- Italian Easter Egg Bread
- [VIDEO] Almond Wreath Bread
- [VIDEO] Chocolate Chips Hot Cross Buns
- [VIDEO] Orange Hot Cross Buns
- [VIDEO] Korean Garlic Bread
- [VIDEO] Brioche Sweet Buns


My Latest Video
Thank You for visiting my website. Please don’t forget to click the “Like” button below if you like this recipe. Lastly, did you know that I have a YouTube Channel? Please support my channel by clicking on the “Subscribe” button in my video and the “Bell” icon to get notification of new videos.
FOLLOW SWEETNSPICYLIVING ON SOCIAL MEDIA
Facebook | Instagram | Pinterest | Twitter | YouTube
Share this:

Categories: Baking, Bread, Recipe, Small Batch Recipes, Video, Video Recipes